
As part of my saxophone case I had to get some hardware of course. Not being able to find what I wanted I had to find out how to antique brass hardware myself. All I was able to get readily antiqued were some D-rings. So I had to find a method to match the new hardware to that old looking one. 
The internet is a great tool for information on this topic. I found a non-chemical way, which is okay and if one likes to use an oven to bake the hardware… this is all fine. However, it didn’t really provide a result I was happy with. A fellow leatherworker from the US explained his method to me. That didn’t work for me either. I wasn’t all too happy with the outcome as well.
The best result was achieved with a self-made chemical solution. At this point I should mention that you can get readily made antiquing solutions, gel and pastes even. If one wants to play around a lot that’s all fine and will make things easier.
CAUTION!!!
Chemicals are toxic and caution must be taken! I have to let you know that you have to follow certain steps when handling chemicals and you should be aware that the same applies to the commercial products.
Wearing gloves, goggles and working in either a very well vented space or outdoors is mandatory.
The recipe for the homemade solution is very simple. It’s 100 ml of ammonia solution (25%) and a teaspoon of copper carbonate. 
If you mix it don’t just drop the powder into the solution as it will become lumpy. Either stir it in smaller amounts right away or don’t worry about it and let it sit over night as the copper carbonate will dissolve in the ammonia.
Now the solution isn’t so toxic that it will cause irritation if you get it onto your skin by accident, but you should wash it off well right away. The regular disposable nitrile gloves aren’t really the best choice to  work with chemicals. Your typical household gloves will do the trick.
Before you dip the hardware into the solution for about 2 seconds a few things have to be done. If it’s new hardware it may have a sealant cote on it and this would have to be removed. Multiple ways are described on just as many posts on the internet. I don’t like to play around a lot, so I put it into acetone and let it sit in there over night. The next day I wiped it down and polished it on the wheel to get rid of the last remains of lacquer or sealant.
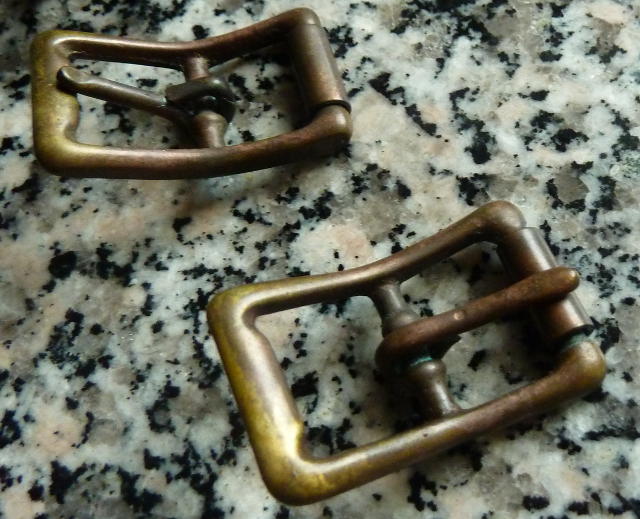
Once it was all dry and cleaned from dust etc. I just dropped the buckles into the solution and let it sit for just a moment. The amount of time isn’t as important as the fact that everything must be covered and then removed from the solution and let the oxygen in the air do its thing. Don’t touch it all too much. You don’t want to remove the solution from the brass until it has dried. Once dry a toothbrush will be a good tool to remove the remaining, now blue powder from the hardware. You can also rinse it with water and scrub it with the toothbrush to remove it all.
This can be your final step, but doesn’t have to be. If you want to retain the result you should add a sealer to this. If you don’t seal it, the brass will just continue to darken until fully brown. This will take quite a bit of time, but it will happen eventually.
The whole process will take you about 2 days with an actual time of about 1 to 2 hours involved. It all depends on which tools you have readily available.